
The Benefits Of Making A Woodland Necklace
There are lots of good outcomes gained through learners making a woodland necklace. If they complete more of the steps, they gain more benefits. If time is against you, or you have a shorter session planned, adapting the stages still allows learners to finish a piece by the end of the session [see the Doing More Steps for expanded steps to include].
Creativity
Creativity is one benefit I always incorporate into each session. This might not seem like a highly creative endeavour, but the process of selecting the pieces to include allows learners a choice. They then arrange a design that is personal and pleasing to them. The size, shape and colour are all be elements that learners can control.

Doing more steps?
Choosing the needle colour expresses creativity and choice.
Motor Control
Another benefit is motor control. Fine motor allows us to utilise the small muscles in our body. Hands, for example, work in tandem with our central nervous system and brain to allow us to pick up, manipulate and move smaller items. Controlling the needle in this activity builds fine motor skills, giving those fingers a good workout, but also building capability for other tasks outside of Forest School.
Doing more steps?
Threading the needle provides another opportunity to develop fine motor. Tying knots to small pieces of twig provides even more practice.

The Power of Choice
One final benefit is on the matter of choice. Somewhat linked in with creativity, learners given time and space to make their own choices gain satisfaction and enjoyment. If I told them to use x pieces in y manner, in a the choice becomes limited. How many combinations of choice could there be in a group? As many as we are willing to let them explore. One caveat will be dependent on the amount of resources you have access to and the number of learners you are working with. Sustainably forestry management [read more on this here] might include limiting the number of pieces is helpful to ensure that everyone is able to participate without exhausting your resources.

How To Make A Woodland Necklace
Resources
As mentioned above, sustainability is the aim.
- Where possible I try to source material from fallen or damaged trees, both on and off site. Harvesting material off site is a great help and doesn’t deplete the limited resources I have on site. If I cut down a tree every time I needed materials, I would soon run out of woodland!
- I use my Silky Ultra Accel 240 Curve saw [see pic above] to cut branches into smaller chunks. With its rip cut function [main cut on the back stroke] this bad boy rips through branches in no time.
- Clamps are handy to hold the branch in place.
- A bucket underneath catches any sawdust which I used to make firelighters with.
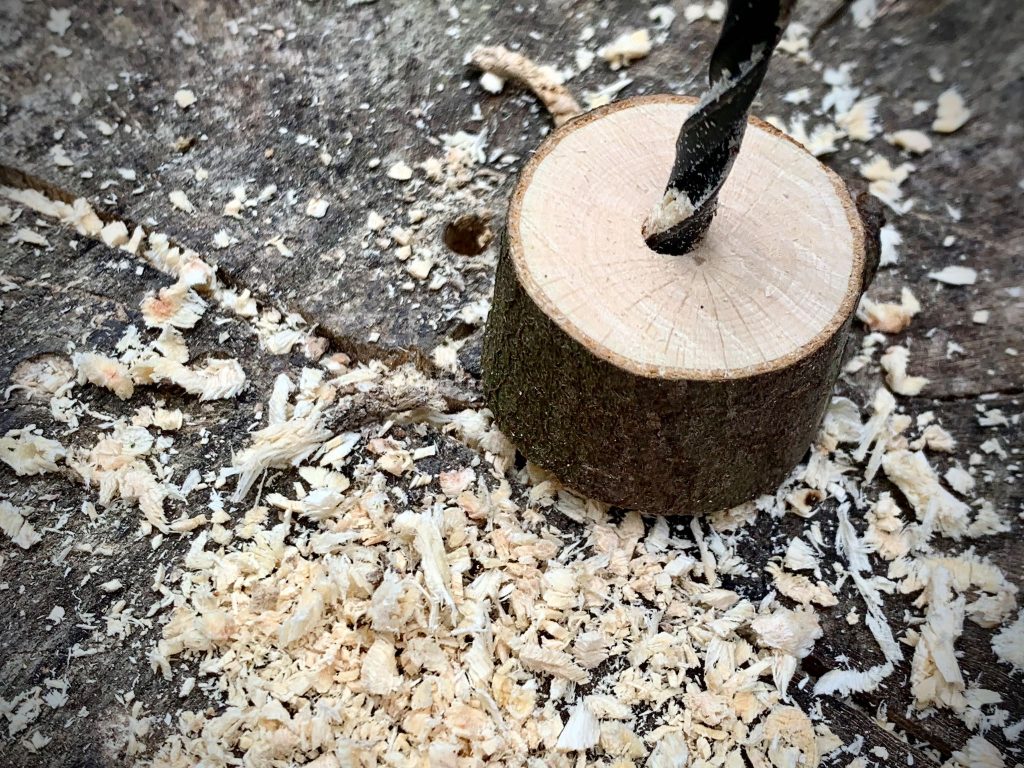
- A cordless drill provides the hole with about a 3-4 mm drill-bit. Also another source of sawdust.
- Thin twigs for the ‘latch’ were sourced from a tree I pruned in my back yard.
- The twine I had to hand for the necklace bit.
Method
I pre-made some of the fiddly parts for the particular session these are for. The holes are drilled, the needles attached and the string pre-tied. As mentioned earlier, learners can engage with most of these tasks, depending on the available time.
Cut branches
Ensure you have enough pieces to cover your total learners for a session plus extra. It is also important to cut them to the right length. Usually no longer than 1 inch thick. If you have a power or mitre saw, this may also help.
Drill holes
Drill holes in each piece of wood so it can be threaded easily. Ensure the drill bit is slightly bigger than the needle.
Make a clasp
Cut small, strong twigs that can be used as a ‘clasp’. I found this helpful as a stop so the pieces don’t slide off the string.
Cut twine
Cut a length of twine about 1 m long. I secured it to the clasp with a clove hitch and half hitch. I also used a small strip of electrical tape to hold the string in place. The length of twine might require adjustment depending on the height of the learner making it. Most children should suffice with 1 m.
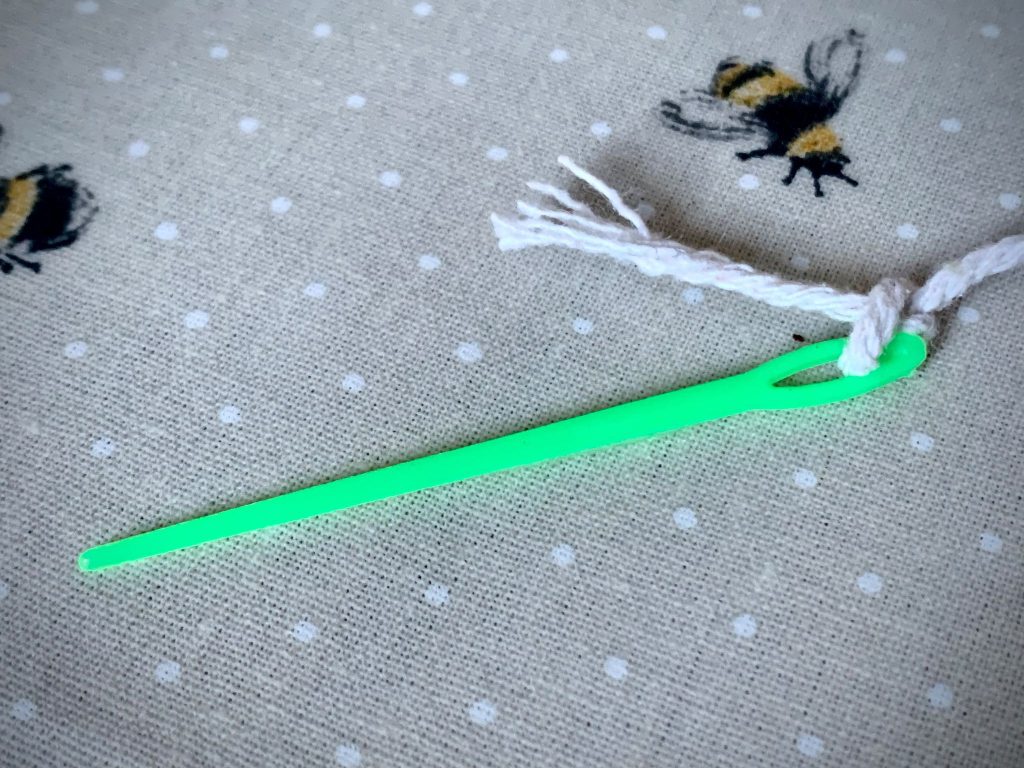
Thread the needle
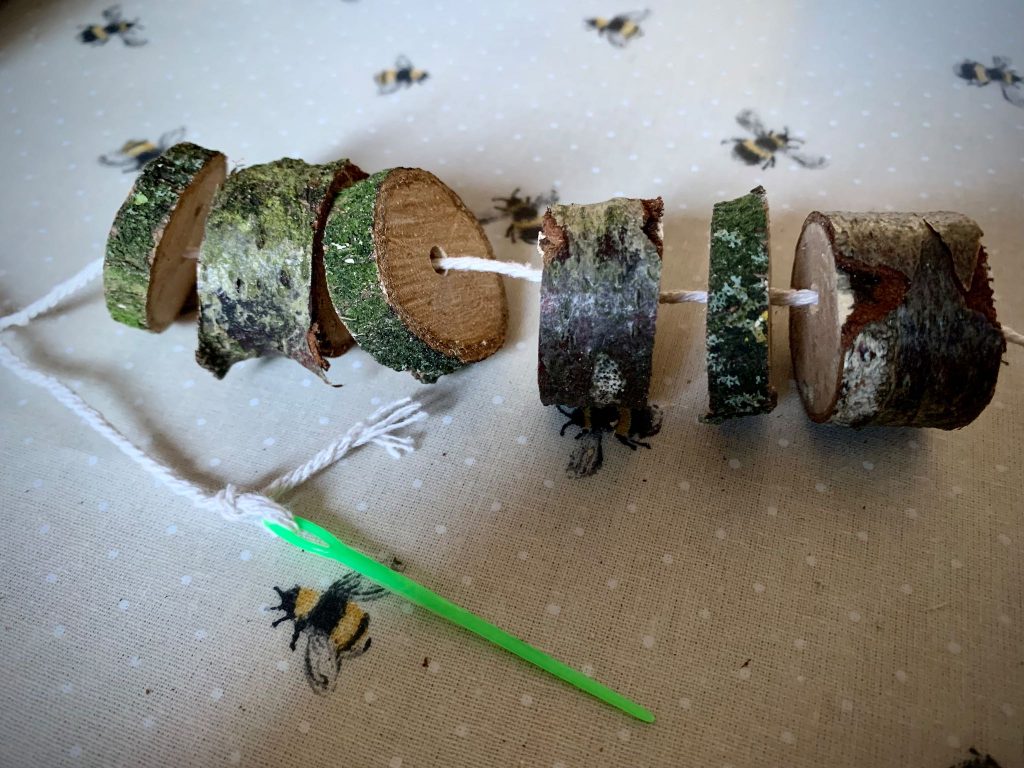
Thread the other end of your twine through a needle and tie with a simple overhand knot. The knot loosens naturally as you continue threading. The needles are plastic for safety and are easily purchased in a bag of 50.
Choose your wood
Choose the pieces of wood you want to thread onto your necklace. This can be alternating or repetitive patterns or a complete random assortment of pieces. Whatever the learner would like to choose. Limits might be required if resources are limited.
Untie the twine
Remove the twine from the needle when all pieces have been threaded.
Tie twine to the clasp
Secure the twine to the clasp with another clove hitch or a simple overhand knot. Use a small strip of electrical tape to secure in place. The electrical tape serves as a secondary safety function.
Transporting Necklace Threads
Making your threads ahead of time? Then I found a little hack to help transport the threads to site. It involves an egg carton. Snip off the lid. Make small cuts around the outside of the egg holding section. Slide the twine in the cuts and allow the clasp to pull up against the side of the carton. The twine stays clear and there are no tangles.


Summary
Making a woodland necklace is a fun process. Leaders will be confident and able to work flexibly keeping these things in mind:
- Using sustainable resource management
- Preparing ahead of time
- Leaving room for creativity and choosing
- Building in opportunities for motor coordination
Learners will therefor have a great experience and want to keep coming back for more fun among the trees.
Make a woodland necklace in a Forest School session with us. Get in touch to make a booking.